XForms tutorial - Chapter 4 - Creating logical paths
Previous chapter | Next chapter
So far, we have created a form that shows us many fields, but not all fields can possibly be relevant to the user: he is either applying as an individual person or he is someone representing a company; but not both at the same time.
Before we do this, we modify the primary instance slightly, as can be seen in the first snippet at the bottom of this page. We introduced a little more structure. Notice that this will affect our XPath queries and references!
Introducing dependencies
Based on the first choice offered on the form (citizen or company), we would like to direct the user to the appropriate trail in the flow of the form. We do this by adding a rule to the model section of our XForms document. We can create dependencies using the relevant property in the model. The statement below indicates that the nodeset company_name, which is part of the instance, is only relevant if the user has selected the choice for “company” in the first step. If a nodeset is not relevant, validations on this nodeset will not be performed.
<xf:bind nodeset="company/name" relevant="instance()/citizen_company='company'"/>
For the individual application, we create these dependencies:
<xf:bind nodeset="instance()/citizen/firstname" relevant=" instance()//citizen_company='citizen'"/>
<xf:bind nodeset="instance()/citizen/middlename" relevant=" instance()//citizen_company='citizen'"/>
<xf:bind nodeset="instance()/citizen/lastname" relevant=" instance()//citizen_company='citizen'"/>
<xf:bind nodeset="instance()/citizen/street" relevant=" instance()//citizen_company='citizen'"/>
<xf:bind nodeset="instance()/citizen/number" relevant=" instance()//citizen_company='citizen'"/>
<xf:bind nodeset="instance()/citizen/postalcode" relevant=" instance()//citizen_company='citizen'"/>
<xf:bind nodeset="instance()/citizen/city" relevant=" instance()//citizen_company='citizen'"/>
<xf:bind nodeset="instance()/citizen/phone" relevant=" instance()//citizen_company='citizen'"/>
<xf:bind nodeset="instance()/citizen/email" relevant=" instance()//citizen_company='citizen'"/>
The XForms Engine will make sure that all defined conditions are evaluated and that controls are disabled or hidden accordingly.
Now, the above dependencies seem redundant. We can improve on the form by simply setting the relevance on the citizen node. If a node becomes irrelevant, all nodes below that node are rendered irrelevant as well.
By adding the attribute incremental to to the select1 control, we make sure that any change of value will immediately cause a recalculation of the model:
<xf:select1 ref="citizen_company" appearance="compact" incremental="true">
The form so far can be seen in action here.
Experimenting with the form
Now we can experiment some with this form. If you are using the Smartsite XForms Engine let the form be rendered in Internet Explorer or another browser. Assuming you have scripting enabled in your browser, you will notice that on choosing the option “I am a citizen” the appropriate inputs will appear, and when choosing the option “I represent a company” the company-related input will appear.
Why does this happen? This is because when JavaScript is enabled in the browser, there is constant – but very lightweight - interaction between the client and the server when changes occur in the browser. The incremental="true" attribute for an input will make sure that the slightest change in the value of the input will be reflected server-side.
Now disable JavaScript. Nothing happens when we make a selection; we don’t see any inputs appearing or disappearing. That is because there is now no trigger event.
Because we obviously also want to provide for situations when JavaScript is disabled, we will need to add a trigger to our form.
<xf:trigger><xf:label>Update</xf:label></xf:trigger>
We can add this line near the bottom of our form. It will display a label with the text “Update” that functions as a trigger; in other words, it will initiate contact with the server and update the instance data, perform a recalculation and revalidation of the form, and display the new form. Of course, the trigger in HTML is translated into a button element that submits the form content to the server. However, in XForms this is all abstracted away from us, and we can continue to think conceptually about our form and the way we want it to work.
We will also add a submit control to the form. The following code adds a submit control. This will be rendered in HTML to show a submit button:
<xf:submit>
	<xf:label>Submit</xf:label>
	<xf:message ev:observer="send" ev:event="xforms-submit-done" level="ephemeral">
            Submit ready...
         </xf:message>
</xf:submit>
Also, in the model, located in the head section of our document, we will have to define what a submit action should really do:
<xf:submission id="send"
	method="post" action="/some url here"
         ref="instance()" serialization="application/xml"
          validate="false" replace="none">
	<xf:message ev:event="xforms-submit-error" if="event('error-type')='validation-error'">
           Validation failed.
         </xf:message>
</xf:submission>
We see an action attribute indicating the page the information will be posted to, we see a reference to what should be submitted (in this case: the default instance, in other words, de data – in XML format – as gathered so far in the instance) and some handling in case server-side validation failed.
Let’s inspect what happens while we enter information into our form. If you are using the Smartsite XForms Workbench to develop your forms, you can inspect instance data as well as traffic and other state information, that is helpful in understanding in what is going on.
We take our form, and render it in the Workbench while scripting is enabled. Make sure that the View > Instance Data option is on, and also the View > Compiled Form and View > Traffic options are enabled.
What you will see now is something like this:
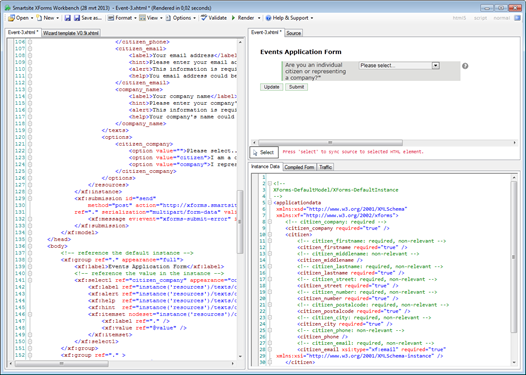
One of the tabs in the right lower section says Instance Data. This tab displays the default instance data, as will be present server-side. The XForms engine has added some explanatory comments to the XML; for the citizen_company element it indicates that it is required, and the other elements, both under the citizen node as well as under the company node, are not relevant.
Now, in the rendered form, select the option “I am a citizen”. The instance data will immediately be updated to represent the changed situation.
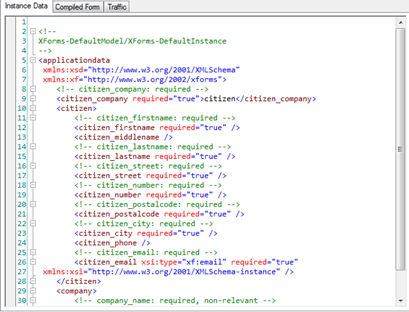
As you can see, the value “citizen” has been inserted into the instance, and the elements under the citizen node are now indicated to be required (with the exception of the phone field). The non-relevant indication is not present anymore.
Now, start typing in your name in the First Name field. As you type, you can see the instance data being updated. Now, remember again, you are looking at server-side data here! Information is updated as you type, because of the incremental="true" attribute setting for the input. Just for a minute, change the incremental attribute value to false and see what happens. Render the form again, select the “I am a citizen” option again, and type your name into the First Name input. Now, the instance data will not be updated until the input loses the focus; when that happens, the server-side instance data will immediately be updated (assuming JavaScript is enabled).
With scripting disabled, the server-side instance data will not be updated until triggered, i.e. by clicking on the trigger that we added or by pressing the submit button.
Don’t forget to enable scripting again. Click the submit button and inspect the Traffic tab at the bottom right part of the Workbench. You can see that a JSON object was sent to the server and a JSON object was returned.
The resulting form (consider it work in progress) can be viewed on our Proforms.biz XForms platform.
Previous chapter | Next chapter
The model revisited
<xf:instance xmlns="">
        <applicationdata>
          <!-- information re individual applicant -->
          <citizen_company required="true" />
		  <citizen>
	          <firstname required="true" />
	          <middlename />
	          <lastname required="true" />
	          <street required="true" />
	          <number required="true" />
	          <postalcode required="true" />
	          <city required="true" />
	          <phone />
	          <email required="true" />
		  </citizen>
          <!-- information re company applicant -->
		  <company>
	          <name required="true" />
		  </company>
        </applicationdata>
      </xf:instance>